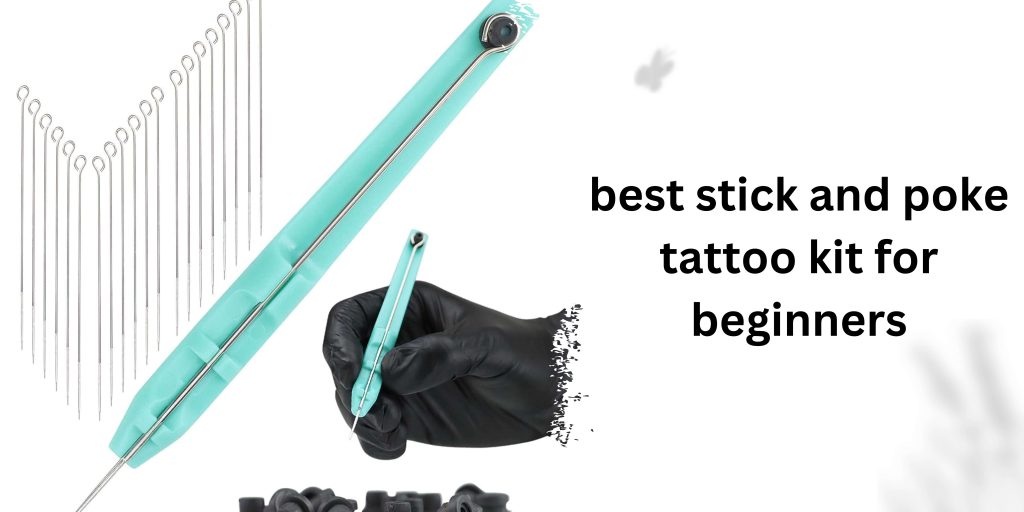
Stick and poke tattooing is an ancient and revered art form that has made a resurgence in recent years. It offers a unique and personal way to create beautiful body art. If you’re a beginner in the world of stick and poke, you’re in the right place. In this guide, we’ll walk you through the intricate process of stick and poke on practice skins, ensuring that you have the knowledge and skills to embark on your tattooing journey with confidence.
Introduction of Stick and Poke on Practice Skins
The World of Stick and Poke
Stick and poke tattooing, also known as hand-poked or non-electric tattooing, involves creating tattoos by manually inserting ink into the skin using a needle or set of needles. Unlike machine tattoos, stick and poke tattoos are created one dot or line at a time, making them a labour-intensive but rewarding art form.
The Importance of Practice Skins
Before attempting to tattoo on human skin, it’s crucial to practice on artificial surfaces, commonly referred to as “practice skins” or “tattoo practice skin.” These synthetic skins mimic the texture and behaviour of real skin, providing an ideal canvas for beginners to hone their skills without the risk associated with practising on people.
Safety First
Safety is paramount in stick and poke tattooing. Proper techniques, equipment, and hygiene practices are essential to prevent infections and ensure a positive tattooing experience.
Gathering Your Supplies
Before you begin your stick and poke journey, you need to gather the necessary supplies:
- Tattoo Needles: Different needle configurations are available. Choose the right one for your design.
- Tattoo Ink: Ensure it’s high-quality and sterile.
- Tattoo Machine (optional): Some artists use a tattoo machine for certain parts of the process.
- Practice Skin: Your canvas for learning.
- Stencil or Design: Plan your tattoo design in advance.
- Disposable Gloves: To maintain a sterile environment.
- Antiseptic Wipes: For cleaning your workspace.
- Tattoo Tray or Container: Keep your equipment organized.
Setting up a clean and organized workspace is equally important.
Understanding Tattoo Needle Types
Needle Configurations
Tattoo needles come in various configurations, including liners and shaders. Liners have fewer needles and are used for outlining, while shaders have more needles and are used for filling. Understanding these differences is crucial for achieving the desired results in your design.
Needle Attachment
Learn how to attach the needle securely to your tattoo machine or grip. This ensures that the needle stays in place during the tattooing process.
Read More: Top stick and poke tattoo kit
Preparing Your Practice Skin

Stretching and Securing
Before you begin tattooing, make sure your practice skin is stretched and secured tightly. This mimics the tension of real skin and ensures an even tattoo.
Design Transfer
Decide whether you’ll use a stencil or freehand drawing for your design. Both methods have their merits, and your choice may depend on your artistic skills and the complexity of the design.
Tattoo Workstation Setup
Set up your tattoo workstation for comfort and efficiency. This includes having all your supplies within reach and ensuring good lighting.
Sterilization and Safety Measures
Equipment Sterilization
Properly sterilize all your tattooing equipment, including needles, grips, and any reusable items. This step cannot be emphasized enough to prevent infections.
Workspace Sanitization
Clean and sanitize your workspace thoroughly. Use antiseptic wipes or solutions to ensure a sterile environment.
Personal Protective Equipment (PPE)
Always wear disposable gloves and consider wearing other PPE like aprons or face masks to protect yourself and your client (if applicable).
Executing the Stick and Poke
Now that your workspace is prepared, it’s time to delve into the stick and poke technique:
Step-by-Step Guide
- Prepare Your Ink: Ensure your ink is ready and accessible.
- Dip Your Needle: Dip the needle into the ink, ensuring it’s adequately saturated.
- Positioning: Hold the needle at the right angle and with the correct grip.
- Poke Technique: Learn the proper poking technique to create clean and precise lines or dots.
- Needle Depth: Maintain consistent needle depth to prevent uneven results.
- Tattoo Progression: Work on your design, following your outline or stencil.
- Ink Replenishment: Re-dip the needle in ink as needed.
- Finishing Touches: Complete your design with finesse.
Pain Management
Tattooing can be uncomfortable, but it shouldn’t be overly painful. Learn techniques to manage pain and ensure a smooth tattooing process.
Caring for Your Practice Skin Tattoo
Post-Tattoo Aftercare
After you’ve finished your practice skin tattoo, it’s essential to care for it properly. This includes cleaning the tattooed area and applying a healing ointment if necessary.
Self-Evaluation
Take the time to evaluate your work. Identify areas for improvement and reflect on your progress as a stick and poke artist.
Common Mistakes to Avoid
Frequent Errors
As a beginner, it’s common to make mistakes. Some common errors include uneven lines, inconsistent shading, and improper depth. Understanding these mistakes and how to correct them is essential for growth.
Troubleshooting
Learn how to troubleshoot issues as they arise. Whether it’s ink spillage, needle breakage, or discomfort, knowing how to address problems can save your tattooing session.
Learning from Mistakes
Mistakes are valuable learning opportunities. Embrace them as a part of your journey to becoming a skilled stick and poke tattoo artist.
Tattoo Practice Skin Alternatives

Pig Skin
The Natural Substitute:
Pig skin closely resembles human skin in texture, making it a popular alternative for tattoo practice. You can often find pig skin at local butcher shops or through online suppliers. Here’s what you need to know about using pig skin:
Fruits and Vegetables
Nature’s Canvas:
Fruits and vegetables offer an unconventional yet effective surface for practising tattooing. These items are readily available, inexpensive, and have unique properties:
- Bananas: Mimic the texture of human skin and provide a good platform for practising lines and shading.
- Grapes: Their small size and round shape are ideal for precision work, such as dotting and fine details.
- Potatoes: Offer a consistent and firm surface for practising various techniques.
Synthetic Tattoo Practice Materials
Designed for Learning:
Several synthetic materials are specifically designed for tattoo practice, offering a compromise between practice skins and unconventional alternatives:
- Silicone Sheets: These sheets mimic the texture and flexibility of human skin, making them a popular choice for beginners.
- Rubber Practice Skins: Unlike traditional synthetic skins, these provide a closer feel to real skin and can be reusable.
Mannequin Hands
Hands-On Experience:
Mannequin hands offer a three-dimensional practice surface, allowing you to practice tattooing on curves and contours. Here’s what you need to know:
Synthetic Skin Pads
The Convenient Choice:
Synthetic skin pads are designed to replicate the feel of real skin and are often used by professional tattoo artists for continuous practice. They come in various shapes and sizes:
Synthetic Hands
A Step Further:
For a more comprehensive learning experience, synthetic hands offer a full hand and wrist, allowing you to practice on a larger canvas:
Leather
Leatherwork for Tattoo Practice:
Leather provides a unique surface for practising tattooing. It’s especially suitable for practising techniques like shading and blending:
Balloons
Balloons as Canvas:
Balloons can be inflated to different sizes and used as a creative canvas for practicing tattooing. Here’s why balloons can be a viable alternative:
Self-Practice
Practice on Yourself (with Caution):
While not an alternative surface, self-practice is a valuable method for tattoo artists to improve their skills. However, it should be approached with caution, especially for beginners.

