Tattoos have been around for centuries and continue to be a popular form of self-expression. One of the most important steps in the tattooing process is creating a stencil. Stencils serve as a guide for the tattoo artist to create an accurate design on the skin. In this article, we will discuss how to print stencils for tattoos and provide tips for achieving high-quality results.
What Is a Tattoo Stencil? and its importance
A tattoo stencil is a transfer of the design that the tattoo artist will be tattooing onto a client’s skin. The stencil is a guide that helps the artist ensure that the design is accurately and proportionally represented on the skin.
The stencil is created using a special type of stencil paper that has a waxy texture. The design is printed onto the stencil paper using a printer, and then the paper is placed onto the skin using a transfer solution. Once the stencil is applied to the skin, the artist can use it as a guide for tattooing.

The importance of using a tattoo stencil lies in the fact that it helps the artist create a precise and accurate representation of the design that the client wants. Without a stencil, the artist would need to freehand the design directly onto the skin, which can be more time-consuming and less accurate. A stencil ensures that the design is positioned correctly, sized appropriately, and accurately represented on the skin. This can reduce the risk of errors or mistakes during the tattooing process, leading to a more satisfying result for both the client and the artist. you can apply this on your skin and you don’t need to think about tattoo fading.
Read More: Best paper tattoo stencil printer
What Are Tattoo Stencil Printers?
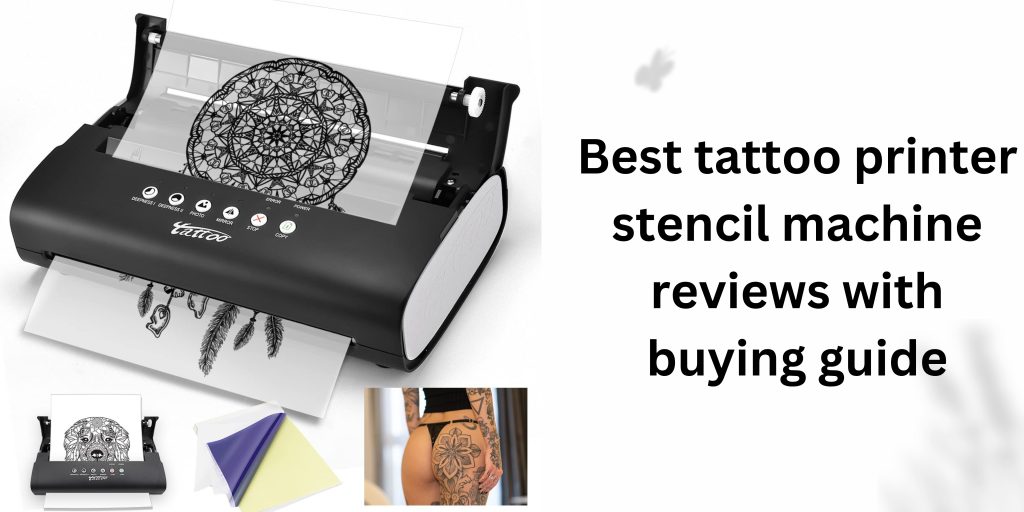
Tattoo stencil printers are specialized printers that are designed to print high-quality stencils onto special stencil paper for use in the tattooing process. These printers use special ink and paper to create a durable, high-quality stencil that will transfer onto the skin easily. you can make temporary tattoos and apply temporary tattoos.

There are two main types of tattoo stencil printers:
| Thermal printers | Inkjet printers |
|---|---|
| Thermal printers use heat to transfer the ink from the ribbon onto the stencil paper. The printer heats up the ribbon, causing the ink to melt and transfer onto the paper. Thermal printers are fast and produce high-quality stencils, but they can be expensive. | Inkjet printers use liquid ink to create the stencil. The printer sprays the ink onto the stencil paper in tiny droplets, creating the design. Inkjet printers are less expensive than thermal printers and are widely available, but they may not produce as high-quality stencils. |
Materials needed for printing stencils for tattoos
you will need the following materials:
- Computer or laptop
- Printer
- Stencil paper
- Image editing software
Steps in printing stencils for tattoos
Follow these steps to print a stencil for your tattoo design and you should also know how to remove stencils from the skin

Choose the design or image:
Select the design or image that you want to use for your tattoo. Make sure that it is high quality and has clear lines and details.

Resize the image to fit the stencil paper:
Use image editing software to resize the image to the desired size. Make sure that it fits within the dimensions of the stencil paper.

Reverse the image:
Flip the image horizontally so that it is a mirror image of the original. This is necessary for the stencil to transfer correctly onto the skin.

Print the image on the stencil paper:
Load the stencil paper into your printer and print the image. Make sure that the printer is set to its highest quality settings for the best results.

Cut the stencil paper to the desired size:
Use scissors to cut the stencil paper to the size that you need for your tattoo.
Tips for printing stencils for tattoos
Here are some tips to help you achieve high-quality results when printing stencils for tattoos:
Use high-quality stencil paper: Invest in high-quality stencil paper to ensure that the design transfers well onto the skin.
Adjust printer settings for better results: Experiment with the printer settings to find the best quality settings for your stencil paper.
Keep the stencil paper clean and dry: Make sure that the stencil paper is clean and dry before printing. Any dirt or moisture can affect the quality of the print.
Use a high-resolution image for better stencil quality: Use a high-resolution image to ensure that the stencil is clear and accurate.
Test the stencil on the skin before tattooing: Before starting the tattoo, apply the stencil to the skin and make sure that it is positioned correctly. This will prevent mistakes and ensure that the tattoo is accurate.
Conclusion
Stencils are an essential part of the tattooing process, providing a guide for the artist to follow while tattooing. By following these steps and tips, you can create high-quality stencils for your tattoo designs. Remember to invest in high-quality materials and test the stencil before tattooing to ensure accuracy and precision. i hope now you understand how to print stencils for tattoos.


